Sunday 25 January 2015

Screw the Scales

Hello Lovelies,
Today I want to write about something I really believe in, which is ignoring that number on the scales. I used to be very fixated to the number on the scales and I would do anything to make it go down even just a little, but for what? Just because the smaller number will mean I feel better about myself?! Writing it down now really makes me understand how crazy that is.
Really my fitness journey was kicked off by seeing that number. After I had been at university for a few months without scales I came home stood on the scales and saw the biggest number I had ever seen on the scales, which made me re-think everything and eventually start my fitness journey. After a few months I had lost 7kg even though I was in no way overweight when I started. Then I started lifting weights, gaining muscles and ignoring the stupid scales. Today I weigh more than I did when I saw “the biggest number ever”. But I am way healthier, way stronger, way leaner. I can run a lot faster, I can lift a lot more and I am happier.
So if I ignore the scales how do I measure my fitness success? PICTURES! Taking progress pictures is the best advice I can give anyone wanted to change their bodies. Also taking a good “before” picture is essential, your future-fitter self will thank you for it! I take progress pictures probably every day, nearly. Because you will not realize all the little changes that are going on in your body day after day, but if you document it with great progress pictures you can look back on a bad day and see how far you have actually already come, even if the scales has not moved much.

#ScrewTheScales
The picture below is my progress picture so far. And as you can see I weigh more than I did two years ago when I decided to change my life for the better. So what? I am happier.
Please share YOUR progress picture with me on Instagram using the hashtag #debsterariella and of course don’t forget #ScrewTheScales
Love,

Saturday 24 January 2015

8 Minute Tabata Ab Workout

Hello lovelies, 
Today I want to share an abs home workout with you that burns!You can do this one anywhere and you won’t need any equipment except the timer on your phone. The way this workout works is that it’s a Tabata HIIT (High Intensity Interval Training) workout. This means you will work for 20sec then take a 10sec break and then start working again for 20sec etc. The workout consists of 4 different abs exercises each of which you will do for 4 intervals of 20sec on and 10sec off (total of 2min). Yes that means this whole workout is only 8 minutes long!!
Little tip for the timing of this, just start your stopwatch on your phone and have the phone on the ground (for exercise 1 & 2) or in your hand (for exercise 3 & 4) so you can see the time at all time, as there are no breaks between the 4 exercises other than the 10sec. 

First up are Plank-Ups


Start in a plank position on your elbows and then move up on to your hands. Then move back down to your elbows and repeat the exercise for 20sec, then take a 10sec break. Repeat 4 times.

Next are Mountain Climbers
Start in a plank position on your hands this time and pull your knee in towards your chest. Make sure not to lift your butt. Switch legs and do this for 20sec, then take a 10sec break. Repeat 4 times.

Next are Leg Raises

Lie on your back with your arms stretch above your head and your legs stretch out but neither should be touching the ground. Then pull your legs and arms into your body center and push them back out. Repeat this exercise for 20sec, then take a 10sec break. Repeat 4 times.

Last but not least are Crunches.

Crunch the top of your abs as you are trying to reach up with your hands. Do this exercise for 20sec, then take a 10sec break. Repeat 4 times.

You’re done!! Do you feel the burn?
Let me know what you think of this ab workout!
X
Debbie 

Wednesday 21 January 2015

Fitness Shaming

Hey lovelies,
Today I want to talk about something a bit different, and I don’t even quite know what to call it maybe – “fitness shaming”?

I made a conscious decision to change my life for the better two years ago, change my activity levels and change the way I eat. This change started off as a new year’s resolution, but has wholeheartedly become my life. This has become something that has changed so much more than just my body. I have learned that life is about how much you put in. You need to work for something if you want it. And that yes you can do amazing things if you just try. Yet, there is one little negative thing that has developed with this new fitness lifestyle – “fitness shaming”.

As soon as someone hears that I ‘eatclean’ or go to the gym on a regular basis they often feel a need to make fun of me. Make fun of the food I eat, the times I go to the gym and the water bottle I carry around with me. It is all done in a joking way, but it is quite clearly still happening.  Things like “You go to the gym aalllll the time, just don’t go today” or “chicken and veggies again, don’t you get sick of it”. Like I am sorry that my eating habits and gym going upsets you so much! Why do you care?!  

Maybe it’s just me, but I feel offended if someone asks me if I can eat this piece of cake. Like why not? I’m not allergic to any types of food; I am not vegan/vegetarian or anything like that so I do not have any dietary restriction. Why would I not be able to eat this cake? If I want to eat a piece of cake I will, but I don’t need people around me questioning what I can or can’t eat. The more I am thinking about it, this is probably more to do with “healthy food shaming”. Why do people get so annoyed if I am snacking on some cucumber slices instead of a chocolate bar?

Another time this “fitness shaming” becomes apparent is when it comes to alcohol. I drink alcohol if and when I want to. Very often I have found that I actually do not want to drink alcohol even if I am going out for drinks with friends. This seems to not be okay with people. Again why do they care if I am drinking a virgin cocktail or one with alcohol? And then all night I get silly comments like “oh are you pregnant?” and “Why don’t you just have one?!” It’s my body I get to choose what I want to put into it.

I was recently invited for a dinner with friends. Days before the dinner I was asked multiple times if there is anything I don’t eat – this was nice, I mean it is kind to check with your guests. And my answer was no, because I eat anything and everything in moderation (I am not a picky eater what so every, thanks mum for forcing me to try everything!). Yet this was not understandable because “You are so healthy, are you sure?” Again, anything is fine. “Do I need to make a salad for you?” No. Being healthy does not mean all I eat is salad! And then at this dinner it was assumed I would not want to have the starter, so it wasn’t served to me. AWKWARD. 

I am sorry this blog post is a bit unorganized and rambly. I want to clarify that this is not everyone; a lot of people are really supportive and interested in knowing more. But then there are these odd people around who seem to care way too much about what I am eating and how I am living my life.
Has anyone else experienced something like this?
Love,

Sunday 18 January 2015

Healthy Chocolate Mousse

Hi Lovelies,

I love chocolate. Who doesn’t? I have a little quick recipe for you today which is a healthy chocolate mousse. Before I actually tried this recipe I was very suspicious – there is no way those ingredients combined can taste anything like heavenly CHOCOLATE?! But in some weird way this really works.

All you will need (for one serving):
Half a banana
Half an avocado
2 table spoons of cacao powder
Sweetener of your choice – I use agave syrup

Process:
Mash half the banana and avocado with the back of a fork.

Add the cacao powder and sweetner.

Blend with a hand mixer until smooth. At this point it looks like chocolate and it’s nearly done.

Just add some extra sweetener depending on how sweet you want it and TADAAAA you’re done. Tastes delicious served with some berries on top!

This is a recipe worth remembering in my option.

If you try this recipe please use the hashtag #debsterariella so I can see all your beautiful creations on instagram!

Looking forward to seeing them.
Love,

Saturday 17 January 2015

Toned Arms - Home Workout

Hey lovelies,

I’ve put together a little arm workout circuit you can do at home. So even if you don’t have a gym membership or access to a gym, there are no excuses. When I started working out I always found it a bit hard to train my arms; but as soon as you get just a little bit stronger it’s so much fun! This circuit is mainly focused on triceps (the back of your arms) which is the area one really wants to tone up, right? This circuit consists of 5 different exercises, and because we are doing these at home you might not have very big weights. If you have a set of dumbbells – great! If you don’t – no worries! You can use a big water bottle or anything else you could find at home that weighs a little something.

First up are Bicep Curls. 
One arm at the time, do your repetitions until failure. This means you keep doing reps until you can’t do another.

Next are dips!
You can use a chair, bench, sofa whatever you can find. If you lift your toes up and only balance on your heels you will engage your core too. Again do this one until failure.

Next some tricep pushups!
If you’ve never done these before they can be hard so feel free to do them on your knees. Make sure your body is straight (no butts in the air) and your elbows stay by your side, as you lower your body down. Again do these to failure!

Next are shoulder presses.
Make sure you don’t move too fast, but rather in a controlled manner up and down. Again, go until you can’t do another rep!

Finally, tricep extensions!
Find something in your house that weights a little something and put it behind your head. Then move your arms up, extend your triceps – do you feel the burn?! Again go until you can’t go anymore.

Try doing this circuit 3-4 times with just small breaks between each exercise. Let me know what you think!
X

Debbie 

Thursday 15 January 2015

Healthy Dinner - Curry Chicken, Rice & Broccoli

Hello Lovelies,
Today I want to share a healthy dinner recipe with you. It’s basically a twist on the classic and boring; Chicken, Rice and Broccoli. Spicing things up and making them more enjoyable makes eating healthy so much easier, which is why I want to share my curry chicken recipe with you. I like to eat my Curry Chicken with basmati rice and broccoli as a post workout meal. This recipe is for roughly 3/4 portions:

All you will need:
400g diced Chicken
1 Onion
1 Garlic Clove
100ml Coconut Milk (or Coconut Milk Powder)
Coconut Oil
1 tbsp of Flour
SPICES; I like using mild curry, curry, chili, garam masala (which is just a blend of spices)
Salt and Pepper

Process:
First chop the onion and garlic clove. Heat two pans and add coconut oil to them. When the oil is heated add in the onion and garlic glove in one pan and the chicken in the other pan.

Make sure the onion become “see-through” but not brown. Then start adding some of your spices to the chicken. (You really don’t need to measure, just add as much as you would like) 


Then add the onion and 100ml of coconut milk to the chicken (and some more spices). Let the mixture cook for a few minutes. 


Turn down the heat and at this point you will probably have to add one tablespoon of flour to the mixture so that it becomes thicker. Make sure you do this at a lower heat and keep stirring so that it doesn’t create clumps.

Add spices, salt and pepper to your taste and you’re done!


As I mentioned before I like to serve this curry chicken with basmati rice and broccoli, but you can have it with whatever you would like. If you try this recipe then please let me know by using the hastag #debsterariella so I can see all your delicious creations on Instagram.

X

Debbie

Tuesday 13 January 2015

My Gym Story

Hello lovelies,

Today I want to write about my "gym journey" and how it has developed over the years. But before we get into how I started I would like to clarify that before January 2013 I was the laziest person ever. I hated sports, was never on any school sports team, did not enjoy doing any physical activity, had asthma, never went to the gym and gym class at school was the worst. I would rather try to only eat fruit and salad for days then actually move – which obviously doesn’t really work in the long term.

Summer 2012 I graduated High school, moved to another country and started university. After half a year at university I came home and noticed I had gained weight from all the alcohol and 3am pizzas I had been consuming. And for some reason it click. In terms of my physically body and abilities these should be the best years so why would I waste them?

I got a gym membership and my university gym had just been refurbished so there were loads of a shine, new machines. I went to the cardio area which is where all females seem to go so I followed. Once I got there I was sure I was not going to run. If there was one thing I knew about gyms it was that I did not want to run. The crosstrainers looked weird, like I would fall off them; so the spinning bikes looked safe – I mean anyone can ride a bike right? I started doing spinning for 30min, 60min, 90min a day. In terms of my nutrition I had also started eating “healthy” – skipping the 3am pizzas and eating more vegetables. And within a few months I had lost quite a bit of weight. I had also started following loads of fitness Instagram account and blogs, just like this one, and learnt more and more about weight training. It seemed to make sense that I should do weight training as well as some cardio but it seemed intimidating, I didn’t know how to use the machine let alone the free weight, as said everyone can ride a bike.

Overtime I started using more of the machines and I realized that firstly people don’t really care if you don’t understand the machine straight away; secondly the machines are not that hard to figure out. I still did my spinning but added machine weight training to the end of my workouts. During the summer I didn’t have access to a real gym so I would join my boyfriend sometimes and he showed me some of free weights exercises I had seen on Instagram and blogs which is when I had the chance to try them with someone around to help me if I didn’t know how to do something.

Second year at university a guy friend of mine joined my university gym and I was in the free weights area with him 6 times a week (skipping cardio nearly always, 6min on a spinning bike was our warm-up, if we could wait that long before going to the free weights). Yes at times I was the only girl in there, but so what? I learned how everything worked and became confident within the free weights area to the point where I would go to the free weights area alone even if my friend couldn’t join at times. Did I get weird looks sometimes? Yes! Did I get comments sometimes? Yes! Did that stop me? No! (I might dedicate a whole blog post to this.)

At the moment I am working out alone during my lunch breaks, which is not quite as fun, as I have a limited time period. But I am lifting 4/5 times a week and have been able to add in HIIT cardio for most sessions and some steady state cardio too.

I have found something that I enjoyed and I am excited to see how my gym “journey” will develop in the future.

Thanks for reading! I hope this inspires some of you to step out of your comfort zone and try something new, you might find something you really enjoy!

If you have any questions or comments feel free to leave them here, on Instagram or by emailing me.
Love,

Sunday 11 January 2015

Healthy Pizza - Cauliflower Base

Hey there Lovelies,

Everyone loves pizza, which is why I want to share a healthier pizza recipe with you that I discovered a little over a year ago. A Cauliflower base pizza!! I know what you are thinking, there is no way this tastes like pizza or even tastes good what so ever. But I must say IT DOES!

All you will need:
Half a cauliflower
1 egg
100g of low-fat grated mozzarella cheese
some grated parmesan cheese
Half a tin of Tomato Sauce (no added sugar)
Cherry Tomatoes
Fresh Basil Leaves
Salt and Pepper

Process:
Pre-heat your oven to 200 degrees C.

Grate the cauliflower with a grater until you have half a cauliflower worth of crumbs (it kinda looks like grated cheese). Place the cauliflower crumbs in a big bowl and microwave for 7/8 minutes or until the cauliflower is soft.

Then let the cauliflower cool and put the cauliflower crumbs in a tea towel and try to squeeze out as much water as possible. Then add in the egg, most of the mozzarella (roughly, 80% or whatever you don’t want to use as topping) and salt and pepper. This will create a doughy, sticky mixture.

Pat the “dough” into the shape you would like on a piece of baking paper and put it in the oven for roughly 10-15min or until it’s golden brown.

While your pizza base is in the oven you can repare your pizza toppings. I am adding fresh basil leaves, tomatoes sauce, cheery tomatoes, parmesan cheese and the rest of the mozzarella.

Take the pizza base out of the oven and add your toppings.

Put the pizza back into the oven for another 10min or until the cheese topping is melted.

Enjoy your healthier pizza!!

If you want to recreate this recipe please use the hashtag #debbieariella so I can see all your delicious pizza creations on Instagram.
Love,

Friday 9 January 2015

Chocolate Banana Pecan Muffins

Hi Lovelies,

I want to share a simple and healthy recipe favourite with you today, my chocolate banana and pecan muffins!
They are dairy free, refined sugar free and flour-less plus they taste really yummy.

You will need:
2 ripe Bananas
2 Eggs
150ml Water
1 cup oats
2.5 tbsp cacao
1 hand-full of pecan nuts
1 tsp vanilla extract
1 tsp baking powder
Sweetener to taste, I use agave syrup

Process:
Pre-heat the oven to 180 degrees C.

Add all ingredients together in a mixer/blender – blend until smooth. 

Fill into muffin cups, this recipe should make roughly 12 small muffins or 6 bigger muffins, depending on the muffin cups you have :) then bake the muffins for 20-25min at 180 degrees C.


Macros for each muffin (12 smaller muffins):
80 calories, 9g carbs, 3g protein, 3g fat

Try the recipe and let me know what you think! You can use the hashtag #debsterariella on Instagram if you want to show me your creations!

Looking forward to seeing them

X
Debbie 

Wednesday 7 January 2015

My Favourite Bootybuilding Workout Exercises

Hello Lovelies,

In terms of my fitness successes my biggest have been my glutes. I enjoy training my glutes and often get asked how I train them, so I thought I would write a blog post about my favourite Booty Building Exercises. You can incorporate any of these exercises into your normal workout or just do them all together as a glutes focused workout. 

The first exercise is Walking Lunges

Lunges work your whole legs not just your glutes but I like doing walking lunges as a warm up as it gets your heart rate going too. To add intensity you can hold dumbbells in your hands while doing the exercise. Make sure your knee at the front does not go over your toes.

Next up are Weighted Hip Raises.

These are one of my all-time favourite exercises and it really works those glutes! Make sure you do this exercise slow and controlled, remember you are working your muscles while you are moving up AND down.

Next are Bulgarian Split Squats

I like the burn of these – let’s just say you’ll feel your butt the next day, especially if you do these with dumbbells in your hands. Place your back leg on a bench or chair, while having most of your weight on the front foot. Then in a controlled movement move down and back up. Don't forget to work both legs, obviously! 

Sumo Squats!

 When it comes to squats I like doing sumo squats as they focus more on the glutes. Your legs should be slightly wider than for normal squats with your feet pointing outwards slightly. Add weights to these too if you can! 

Next are Kick Backs.

These are easy to do at home or can be done at the gym on a machine with extra weight. If you are doing these at home remember to do them slowly on your way up as well as down – you use your muscles both ways!

And last but not least are Stiff Leg Deadlifts.

This is a compound exercises which means it works many muscles in your body – but there is a focus on glutes and hamstrings! Remember to keep your legs a little bent; you don’t want to lock your knees as this can cause injuries.

Try doing 10-12 reps and 3-4 sets of each exercise and let me know what you think!

X

Debbie 

Sunday 4 January 2015

Protein Pancakes without Protein Powder

Hello Lovelies,
Today I wanted to share a healthy recipe with you. My protein pancakes without protein powder. I use to read loads of recipes for protein pancakes and they always included protein powder. Plus the ones I tried to make with protein powder always tasted a bit chemical – there I said it! So I’ve created a protein pancake recipe without protein powder.

All you will need:
1 whole egg
2 egg whites
Half a mashed banana
30g ground oats
A little sweetner of your choice 


Process:
First mash half the banana (you can use the other half of the banana as a topping for your pancakes) with the back of a fork. 


Then grind the 30g of rolled oats in a food processor until it is fine (looks nearly like flour). 


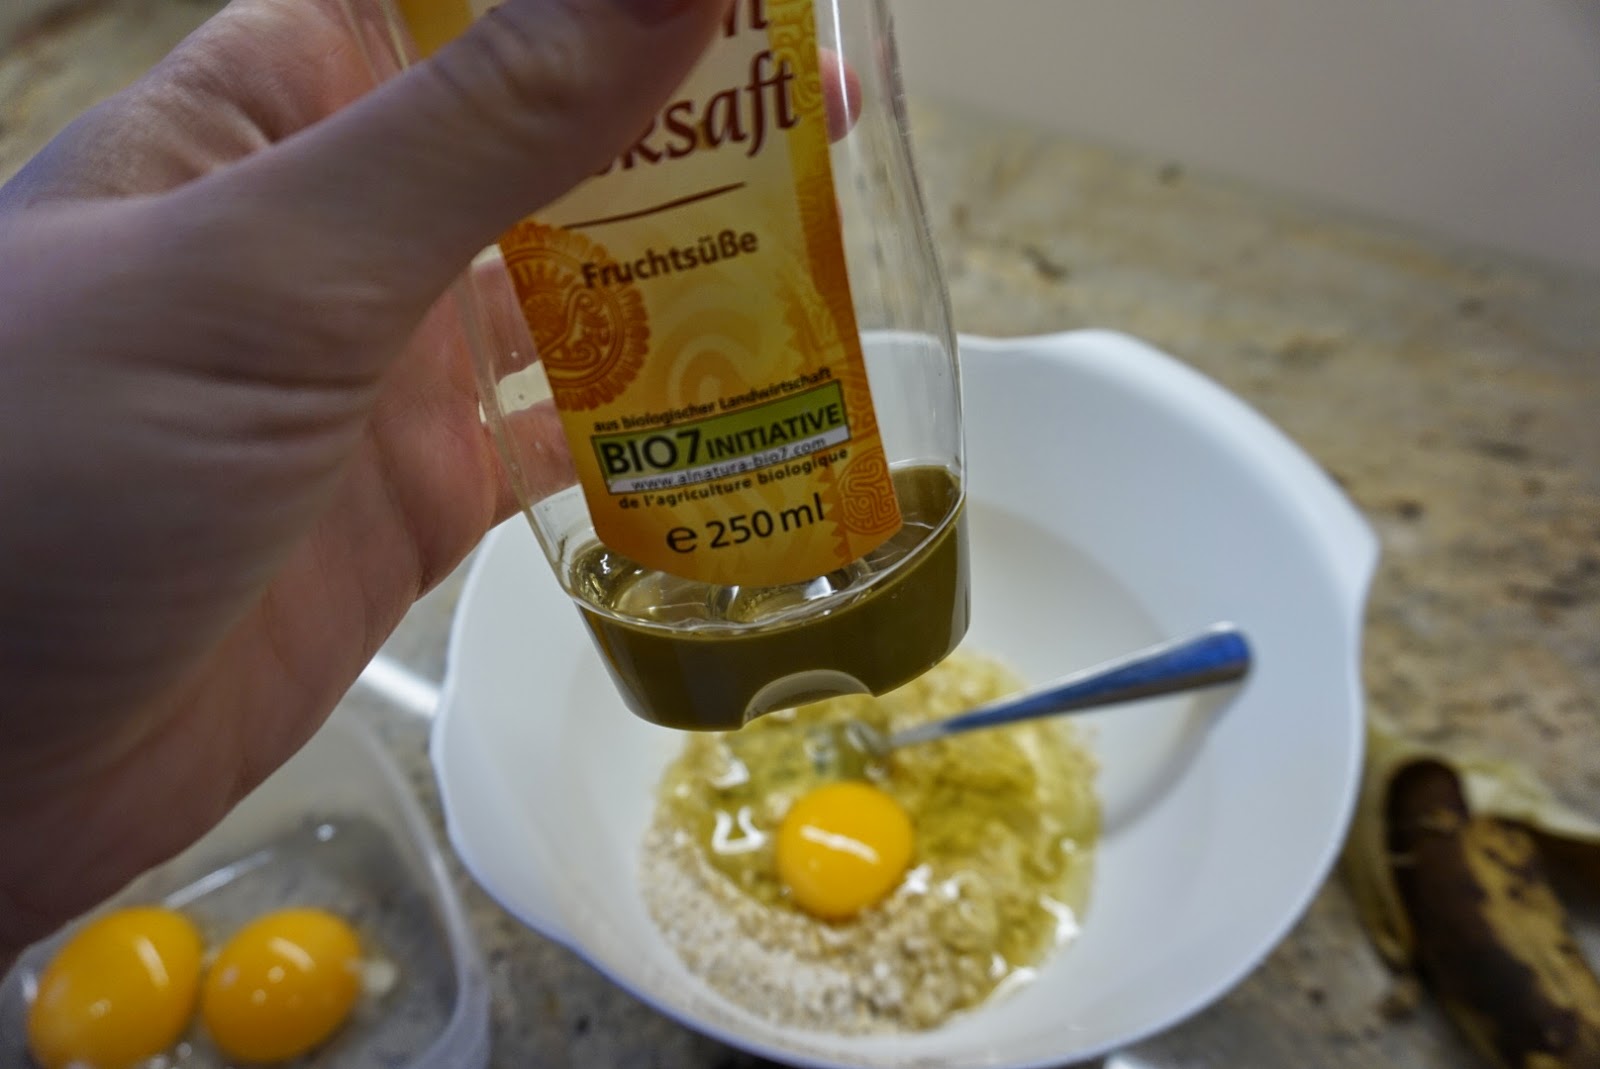
Add the ground oats into the bowl with the mashed banana and add the whole egg as well as the two egg whites. Make sure you don't throw away the egg yokes - you can add them to an omelette or scrambled eggs. 


Add a little bit of sweetner of your choice to the mixture. I like using agave syrup but you could use honey or stivia instead.


Whisk the mixture together well and heat a pan to a medium heat with coconut oil or any other cooking fat you like to use. 


Pour as much as you want in the pan, depending on how big you want to make your pancakes. I usually make 5-6 pancakes from this mixture depending on the size of the eggs and the banana of course. Wait for there to be bubble in the batter (that indicates that it is time to flip the pancake) – this can be tricky the first few times, but you get the hang of it. 


Then I like to top my pancakes with agave syrup and fresh fruit, but this is where you can get creative.


Try this recipe and let me know what you think! If you make your own pancakes use the hashtag #debsterariella so I can see your delicious creations.

Looking forward to seeing them 
X

Debbie